
Admin Commands
The Admin Commands tab provides comprehensive remote management capabilities for Meshtastic nodes, allowing administrators to configure and control both locally connected and remote nodes in the mesh network.
WARNING
Admin commands directly modify Meshtastic device settings and can affect device functionality or network connectivity. Always ensure you understand the impact of changes before applying them. Some commands (like factory reset or purge node database) are destructive and cannot be undone.
Access
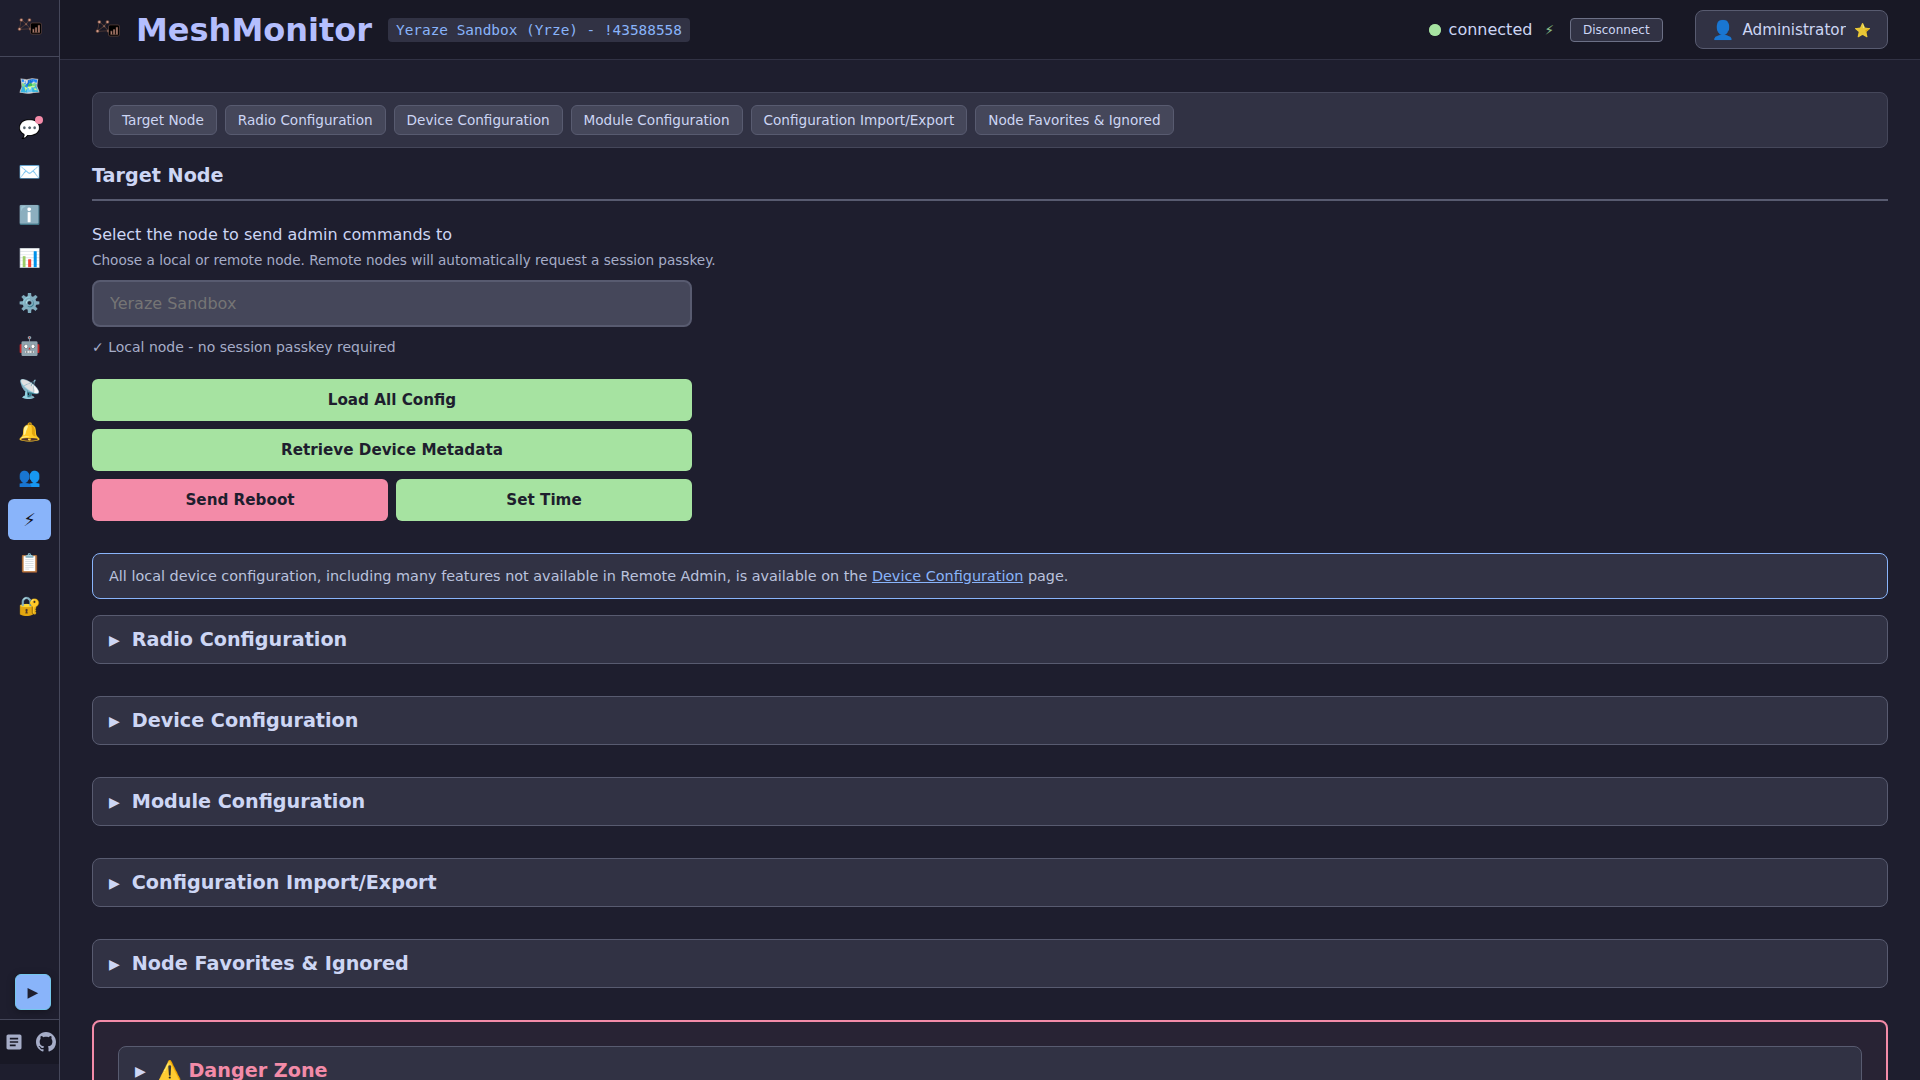
The Admin Commands tab is available to users with admin privileges only. It appears in the sidebar under the "Admin" section with a ⚡ icon.
Node Selection
Before executing any admin command, you must select a target node:
- Node Dropdown: Click the node selector at the top of the page
- Search Functionality: Type to search for nodes by name or node number
- Node Types:
- Local Node: The node directly connected to your MeshMonitor instance (marked with "Local")
- Remote Nodes: Other nodes in the mesh network that are not directly connected
The selected node's information is displayed, and all commands will target this node.
Device Management Commands
Reboot Device
Reboots the selected node with a configurable delay.
Settings:
- Reboot Delay: 0-60 seconds (default: 5 seconds)
Use Cases:
- Apply configuration changes that require a reboot
- Recover from device issues
- Restart after firmware updates
Side Effects:
- Device will disconnect and reconnect
- All active connections will be lost temporarily
- Configuration changes take effect after reboot
Factory Reset
Completely resets the device to factory defaults, erasing all configuration.
DANGER
WARNING: Factory reset is irreversible. All device settings, channels, and configurations will be permanently deleted. The device will need to be reconfigured from scratch.
What Gets Reset:
- All device settings
- All channel configurations
- Owner information
- LoRa settings
- Position settings
- MQTT configuration
- Node database
Use Cases:
- Preparing device for new deployment
- Resolving severe configuration issues
- Clearing all data before transfer to new owner
Set Owner
Configures the node owner information.
Settings:
- Long Name: Full display name (up to 39 characters)
- Short Name: 4-character abbreviation
- Unmessagable: Prevent receiving messages from other nodes
Use Cases:
- Setting device ownership information
- Configuring node identity
- Privacy settings for specific deployments
Side Effects:
- Owner information is broadcast to the mesh network
- Changes may take several minutes to propagate
- Requires device reboot to take effect
Set Device Config
Configures device role and node information broadcasting.
Settings:
- Device Role:
- CLIENT: General-purpose mode (default)
- CLIENT_MUTE: Receives but doesn't relay packets
- ROUTER: Always rebroadcasts packets (infrastructure mode)
- Node Info Broadcast Interval: How often to broadcast node information (minimum: 3600 seconds)
Use Cases:
- Optimizing network topology
- Configuring infrastructure nodes
- Adjusting network update frequency
Side Effects:
- Role changes affect power consumption and network behavior
- ROUTER mode significantly increases power usage
- Requires device reboot to take effect
LoRa Configuration
Configure the LoRa radio settings for the selected node.
Preset Mode (Recommended)
When "Use Preset" is enabled, you can select from predefined modem presets:
- Long Fast: Long range, fast data rate
- Long Slow: Long range, slow data rate
- Very Long Slow: Maximum range, slowest data rate
- Medium: Balanced range and speed
- Short: Short range, fast data rate
- Long Modem Preset 1-8: Additional preset options
Manual Mode
When "Use Preset" is disabled, you can manually configure:
- Bandwidth: Channel bandwidth (125, 250, 500 kHz)
- Spread Factor: Spreading factor (7-12)
- Coding Rate: Error correction coding rate (5-8)
- Frequency Offset: Frequency offset in Hz
- Override Frequency: Override default frequency
Common Settings
- Region: LoRa region (US, EU433, EU868, CN, JP, ANZ, KR, TW, RU, IN, NZ865, TH, LORA_24, UA433, UA868, MY433, MY919, BN, etc.)
- Hop Limit: Maximum number of hops for packet forwarding (1-7)
- TX Power: Transmission power level
- Channel Number: LoRa channel number
- SX126X RX Boosted Gain: Enable boosted receive gain (for SX126X chips)
Use Cases:
- Optimizing range vs. data rate
- Complying with regional regulations
- Adjusting network topology
- Fine-tuning radio performance
Side Effects:
- Changes affect communication range and reliability
- Incompatible settings may break network connectivity
- Requires device reboot to take effect
Position Configuration
Configure how the device broadcasts its position.
Settings:
- Position Broadcast Interval: How often to broadcast position (minimum: 32 seconds)
- Smart Position: Enable intelligent position broadcasting (reduces broadcasts when stationary)
- Fixed Position: Lock device to a fixed location
- Fixed Latitude: Latitude coordinate
- Fixed Longitude: Longitude coordinate
- Fixed Altitude: Altitude in meters
Use Cases:
- Reducing battery usage for stationary nodes
- Setting up fixed infrastructure nodes
- Optimizing position update frequency
Side Effects:
- Smart position reduces broadcasts when device is stationary
- Fixed position prevents GPS-based position updates
- Requires device reboot to take effect
MQTT Configuration
Configure MQTT broker settings for the device.
Settings:
- Enabled: Enable/disable MQTT functionality
- Address: MQTT broker address (e.g.,
mqtt.example.com:1883) - Username: MQTT broker username
- Password: MQTT broker password
- Encryption Enabled: Enable TLS/SSL encryption
- JSON Enabled: Use JSON message format
- Root: Root topic prefix for MQTT messages
Use Cases:
- Integrating with external MQTT infrastructure
- Enabling cloud connectivity
- Bridging mesh networks
Side Effects:
- MQTT connection affects device power consumption
- Network connectivity required for MQTT to function
- Requires device reboot to take effect
Channel Management
Loading Channels
For remote nodes, you must first load channels before viewing or editing them:
- Select the target node
- Click "Load Channels" in the Channel Management section
- Wait for channels to load (progress is shown)
- Channels will appear in the list below
Note: Local nodes automatically show their channels, but you can still use "Load Channels" to refresh the list.
Viewing Channels
Channels are displayed in a table showing:
- Slot ID: Channel slot number (0-7)
- Name: Channel name
- Encryption: Whether channel is encrypted (🔒) or unencrypted
- Role: PRIMARY, SECONDARY, or DISABLED
- Uplink/Downlink: Direction indicators (↑ ↓)
- Actions: Edit and Export buttons
Editing Channels
- Click "Edit" next to the channel you want to modify
- Configure channel settings:
- Name: Channel name
- PSK: Pre-shared key for encryption (leave empty for unencrypted)
- Role: PRIMARY, SECONDARY, or DISABLED
- Uplink Enabled: Allow sending messages on this channel
- Downlink Enabled: Allow receiving messages on this channel
- Position Precision: Position precision bits (0-32)
- Click "Save Channel" to apply changes
Use Cases:
- Adding new channels
- Modifying existing channel settings
- Enabling/disabling channels
- Changing encryption keys
Side Effects:
- Channel changes affect mesh network connectivity
- Incorrect PSK will break encrypted communication
- Requires device reboot to take effect
Importing Channels
Import channel configurations from Meshtastic URLs:
- Click "Import Channel" button
- Select target slot (0-7)
- Paste Meshtastic configuration URL
- Review decoded channel information
- Click "Import" to apply
Supported Formats:
- Meshtastic configuration URLs (meshtastic.org/e/...)
- Channel-only URLs
- Full configuration URLs (includes LoRa settings)
Use Cases:
- Copying channels between devices
- Restoring channel configurations
- Sharing channel settings
Exporting Channels
Export individual channel configurations:
- Click "Export" next to the channel
- Generated URL and QR code are displayed
- Copy URL or scan QR code with Meshtastic app
Use Cases:
- Sharing channel configurations
- Backing up channel settings
- Transferring channels to other devices
Configuration Import/Export
Full Configuration Import
Import complete device configuration (channels + LoRa settings) from a Meshtastic URL:
- Click "Import Configuration" button
- Paste Meshtastic configuration URL
- Review decoded configuration
- Select which channels to import
- Choose whether to import LoRa settings
- Click "Import" to apply
What Gets Imported:
- Selected channels (all settings: name, PSK, role, uplink/downlink)
- LoRa configuration (if selected)
- Device settings (if included in URL)
Use Cases:
- Complete device setup from backup
- Cloning device configuration
- Restoring from configuration backup
Full Configuration Export
Export complete device configuration to a Meshtastic URL:
- Click "Export Configuration" button
- For remote nodes, channels and LoRa config are automatically loaded
- Select which channels to include
- Choose whether to include LoRa settings
- Generated URL and QR code are displayed
- Copy URL or scan QR code
What Gets Exported:
- Selected channels (all settings)
- LoRa configuration (if selected)
- Compatible with official Meshtastic apps
Use Cases:
- Creating configuration backups
- Sharing complete device setup
- Transferring configuration between devices
Database Management
Purge Node Database
Removes all nodes from the device's node database.
DANGER
WARNING: This operation is irreversible. All stored node information will be permanently deleted. The device will need to rediscover nodes through normal mesh network operation.
What Gets Deleted:
- All stored node information
- Node positions
- Node metadata
- Connection history
What Stays:
- Device configuration
- Channel settings
- Owner information
Use Cases:
- Clearing stale node data
- Resolving node database corruption
- Starting fresh node discovery
Side Effects:
- Device will need to rediscover all nodes
- Temporary loss of node information
- Network topology may be affected until rediscovery completes
Remote Node Support
The Admin Commands tab supports managing nodes that are not directly connected to your MeshMonitor instance:
How It Works
- Session Passkey Management: MeshMonitor automatically handles authentication with remote nodes using session passkeys
- Per-Node Storage: Configuration data is stored separately for each node to prevent conflicts
- Mesh Communication: Commands are sent through the mesh network to reach remote nodes
Remote Node Operations
All admin commands work with remote nodes:
- Device management (reboot, factory reset, set owner, set configs)
- Channel management (load, edit, import, export)
- Configuration import/export
- Database management
Limitations
- Network Connectivity: Remote nodes must be reachable through the mesh network
- Response Time: Commands may take longer to execute on remote nodes
- Reliability: Success depends on mesh network connectivity and node availability
Best Practices
Before Making Changes
- Backup Configuration: Export current configuration before making changes
- Test on Non-Critical Nodes: Test commands on non-essential nodes first
- Understand Impact: Review what each command does before executing
- Check Network Status: Ensure mesh connectivity is stable
Configuration Management
- Document Changes: Keep notes of configuration changes
- Version Control: Export and save configurations regularly
- Test After Changes: Verify device functionality after configuration changes
- Monitor Network: Watch for network issues after applying changes
Security Considerations
- Admin Access Only: Ensure only trusted administrators have access
- Secure Passwords: Use strong passwords for MQTT and other services
- Encryption Keys: Protect channel PSKs and never share them publicly
- Session Security: Admin commands require valid authentication
Troubleshooting
Commands Not Executing
- Check Node Selection: Ensure a node is selected
- Verify Connectivity: Check mesh network connectivity
- Check Permissions: Verify you have admin privileges
- Review Error Messages: Check toast notifications for specific errors
Remote Node Issues
- Network Connectivity: Ensure remote node is reachable through mesh
- Session Passkey: MeshMonitor handles this automatically, but network issues may prevent authentication
- Timeout: Remote commands may take longer; wait for completion
Configuration Not Applying
- Reboot Required: Many changes require device reboot
- Check Settings: Verify settings were saved correctly
- Export/Compare: Export configuration to verify changes were applied
Related Documentation
- Device Configuration - Local device configuration
- Settings - General MeshMonitor settings
- Meshtastic Official Documentation - Meshtastic protocol documentation